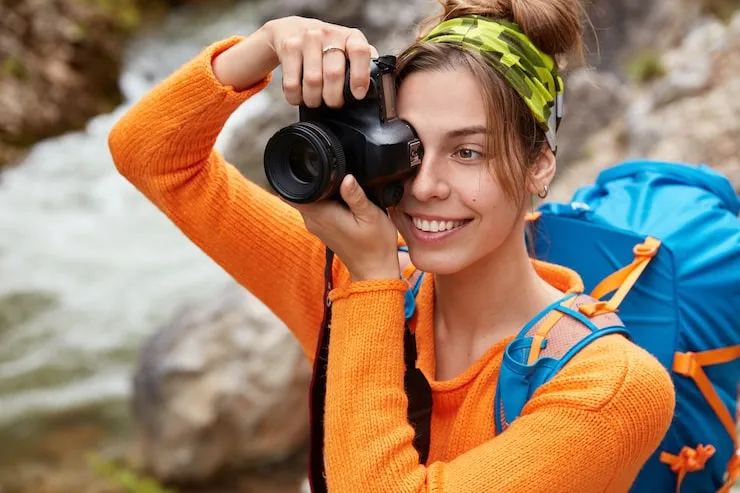
Travel photography is all almost capturing the minute, whether it is a active road, a calm town, or a dazzling scene. The right camera settings can make a gigantic distinction. You don’t require complicated equip or dubious settings. With straightforward alterations, you can take astounding photographs wherever you go. Let’s plunge into the best camera settings for travel photography that will offer assistance you take clear, shinning, and excellent shots.
1. Choosing The Right Mode
When it comes to travel photography, choosing the right camera mode is vital. Numerous apprentices think full programmed mode is sufficient. Whereas auto mode is simple, it does not continuously allow the best comes about. You can have more control by utilizing gap priority.
- Aperture need: This lets you control the profundity of field. You can make the foundation hazy or keep everything sharp.
- Shutter need: This is valuable for moving subjects. You can solidify movement or appear development with blur.
Using Auto ISO with these modes can moreover offer assistance. Auto ISO lets your camera alter the brightness consequently whereas keeping your chosen opening or shade speed. For most travel circumstances, opening need with Auto ISO is a straightforward and compelling choice.
You May Also Like: Best Travel Photography Destinations
2. Aperture Settings
Aperture is the measure of the focal point opening. It influences how much light enters your camera and how sharp the foundation looks. For travel photography:
- Use f/8 to f/11 for scenes. This keeps the entire scene sharp.
- Use f/2.8 to f/5.6 for representations or road photography. This makes the subject stand out from the background.
If you are uncertain, f/5.6 is a secure choice. It works in most light conditions and gives sufficient profundity of field. Keep in mind, littler numbers cruel brighter photographs and hazy foundations. Greater numbers make the picture more honed but darker.
3. Shutter Speed Tips
Shutter speed controls how long your camera sensor is uncovered to light. Quick shade speeds solidify movement. Moderate screen speeds appear development, like streaming water. For travel:
- 1/250 or speedier for strolling individuals or moving vehicles.
- 1/60 for stationary objects in moo light.
If you are not utilizing a tripod, maintain a strategic distance from exceptionally moderate shade speeds. They can make your photographs hazy. When capturing children or creatures, a quick shade speed is way better to capture activity clearly.
4. ISO Settings
ISO controls your camera’s affectability to light. Higher ISO works in moo light but can make your photographs loud or grainy. Lower ISO gives cleaner pictures. For travel:
- Start with ISO 100 to 400 in daylight.
- Use ISO 800 to 1600 inside or in dim light.
Modern cameras handle tall ISO way better, so don’t be perplexed to increment it marginally. The key is to keep the picture shinning without losing as well much quality.
5. Focus Settings
Focus is significant for sharp pictures. Travel scenes are quick, and your subject might move. Here’s what works best:
- Use ceaseless autofocus (AF-C) for moving subjects.
- Choose wide-area center to cover more of the frame.
- For representations, utilize confront location if your camera bolsters it.
If you are shooting scenes, manual center or single-point center can offer assistance keep everything sharp. Don’t disregard, centering rapidly makes a difference you not miss the idealize moment.
6. Metering And Exposure
Metering tells your camera how shinning or dim the scene is. For travel photography, framework or multi-area metering works best. It measures light in the entirety frame.
Sometimes the light is dubious. Shinning skies and dull lanes can confound the camera. In these cases, utilize introduction remuneration. A little negative alteration like -0.3 to -0.7 EV keeps subtle elements in the shinning regions and maintains a strategic distance from washed-out highlights.
Read Also: Best Camera for Travel Photography Beginners: Top Picks for 2025
7. Extra Tips For Travel Photography

Travel photography is erratic. You require to be prepared for anything. Here are a few additional tips:
- Shoot in bursts: Take a few shots rapidly to increment your chance of a great photo.
- Use a wide-angle focal point: It makes a difference capture enormous scenes and streets.
- Keep your camera light: A little camera or mirrorless demonstrate is less demanding to carry.
- Also, continuously check your histogram. It appears if your photo is as well dim or as well shinning. Alter your settings rapidly if needed.
FAQs About Travel Photography Camera Settings
Q1: Should I use automatic mode for travel photography?
Programmed mode is simple but gives less control. Opening need with Auto ISO is way better. It lets you control profundity of field and keeps photographs shinning in any light.
Q2: What is the best ISO for travel photography?
Begin with ISO 100-400 in sunshine. Increment to ISO 800-1600 inside or in moo light. Keep it as moo as conceivable for clean images.
Q3: How do I focus quickly when traveling?
Utilize ceaseless autofocus (AF-C) for moving subjects and wide-area center. For representations, confront discovery works well. Manual center works for landscapes.
Conclusion
The "best camera settings for travel photography" are basic. Utilize gap need with Auto ISO. Alter screen speed for movement, ISO for light, and center mode for sharp pictures. Take parcels of shots and don’t stress around making botches. Travel photography is almost capturing the minute, so hone these tips and appreciate taking extraordinary pictures anywhere.
With these simple settings, you can take clear, shinning, and excellent travel photographs without stretch. Keep your camera prepared, observe the light, and have fun investigating the world with your focal point.